Abelia mosanensis (Fragrant Abelia) – Complete Growing Guide
If you have ever gardened in the colder regions of North America or Europe, you’ve likely looked at the glossy, fragrant abelia shrubs of the South with a bit of envy. For a long time, these beautiful, sweet-scented plants were strictly off-limits for northern landscapes due to their delicate nature. That all changed when Abelia mosanensis—commonly known as the Fragrant Abelia or Korean Abelia—entered the horticultural scene.
This tough-as-nails deciduous shrub brings a dramatic twist to the landscape. Unlike its delicate southern cousins, this species is entirely deciduous and boasts an incredible cold tolerance, giving northern gardeners a reliable, multi-season showstopper that shrugs off harsh winters and fills the spring air with an intoxicating perfume.
Botanical Background and Taxonomy
To understand why this plant is so resilient, it helps to look at where it comes from. Abelia mosanensis belongs to the honeysuckle family (Caprifoliaceae) and is native to the central and northern regions of the Korean Peninsula. In fact, its specific species name, mosanensis, points directly to Mount Mosan in North Korea, which is where the very first botanical sample was collected.
If you are hunting for this plant online or at a local nursery, you might run into a bit of botanical confusion. Modern plant taxonomists have technically shifted this species into a different genus, reclassifying it as Zabelia tyaihyoni (with Zabelia mosanensis listed as its official synonym). However, the gardening world moves a bit slower than scientific journals; it is still almost universally marketed, sold, and talked about under its classic name, Abelia mosanensis.
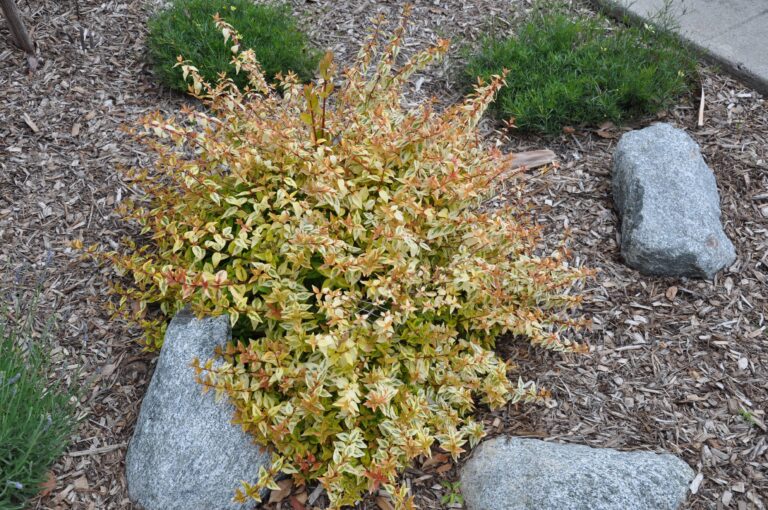
In terms of growth habit, this shrub typically matures into a beautifully balanced, rounded shape reaching 4 to 6 feet (1.2 to 1.8 metres) tall and wide. It features a multi-stemmed structure with loose, upright-arching branches that give it a soft, natural grace. The major difference between this and other abelias you might see down south is that it is fully deciduous. Instead of trying to hold onto its leaves through freezing temperatures, it drops them cleanly every autumn after putting on a spectacular color show.
Flowers and Fragrance: The Main Event
Let’s be honest: the absolute number one reason to clear a spot in your yard for this shrub is its spring flower display and the jaw-dropping fragrance that comes with it.
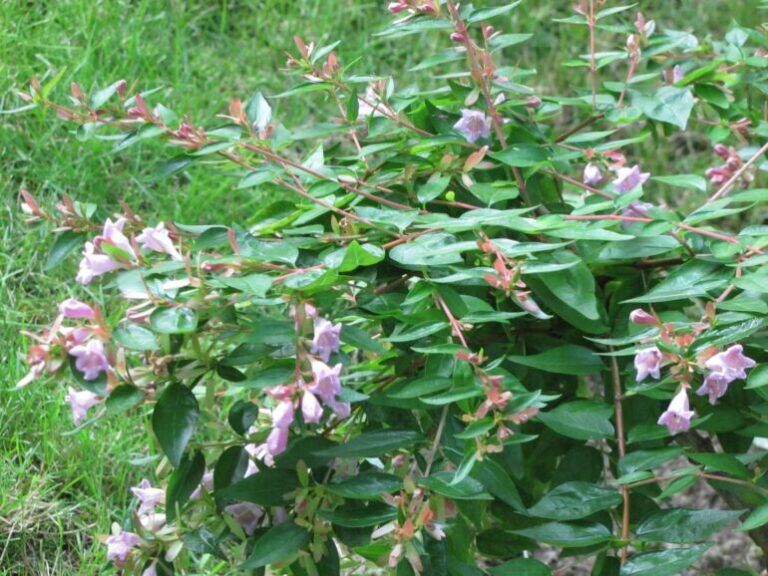
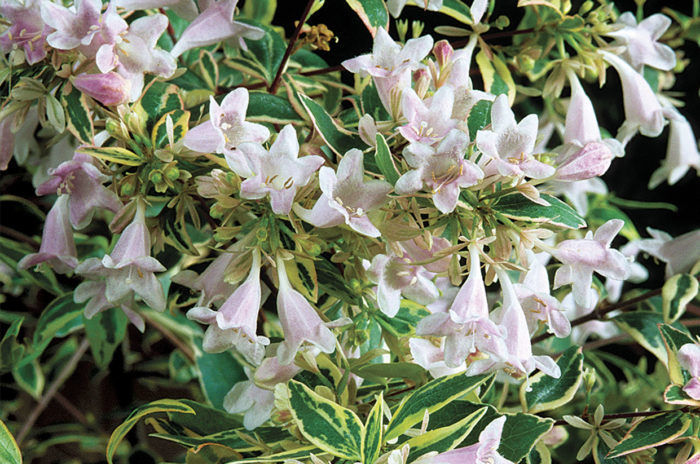
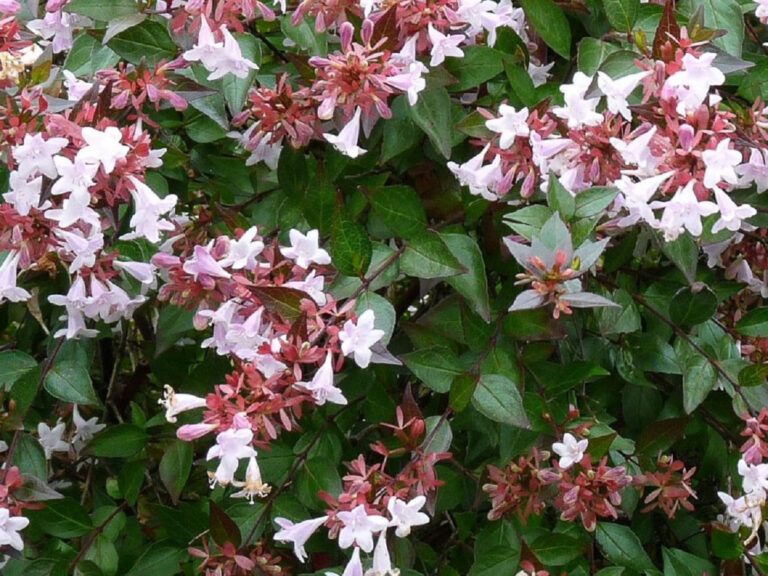
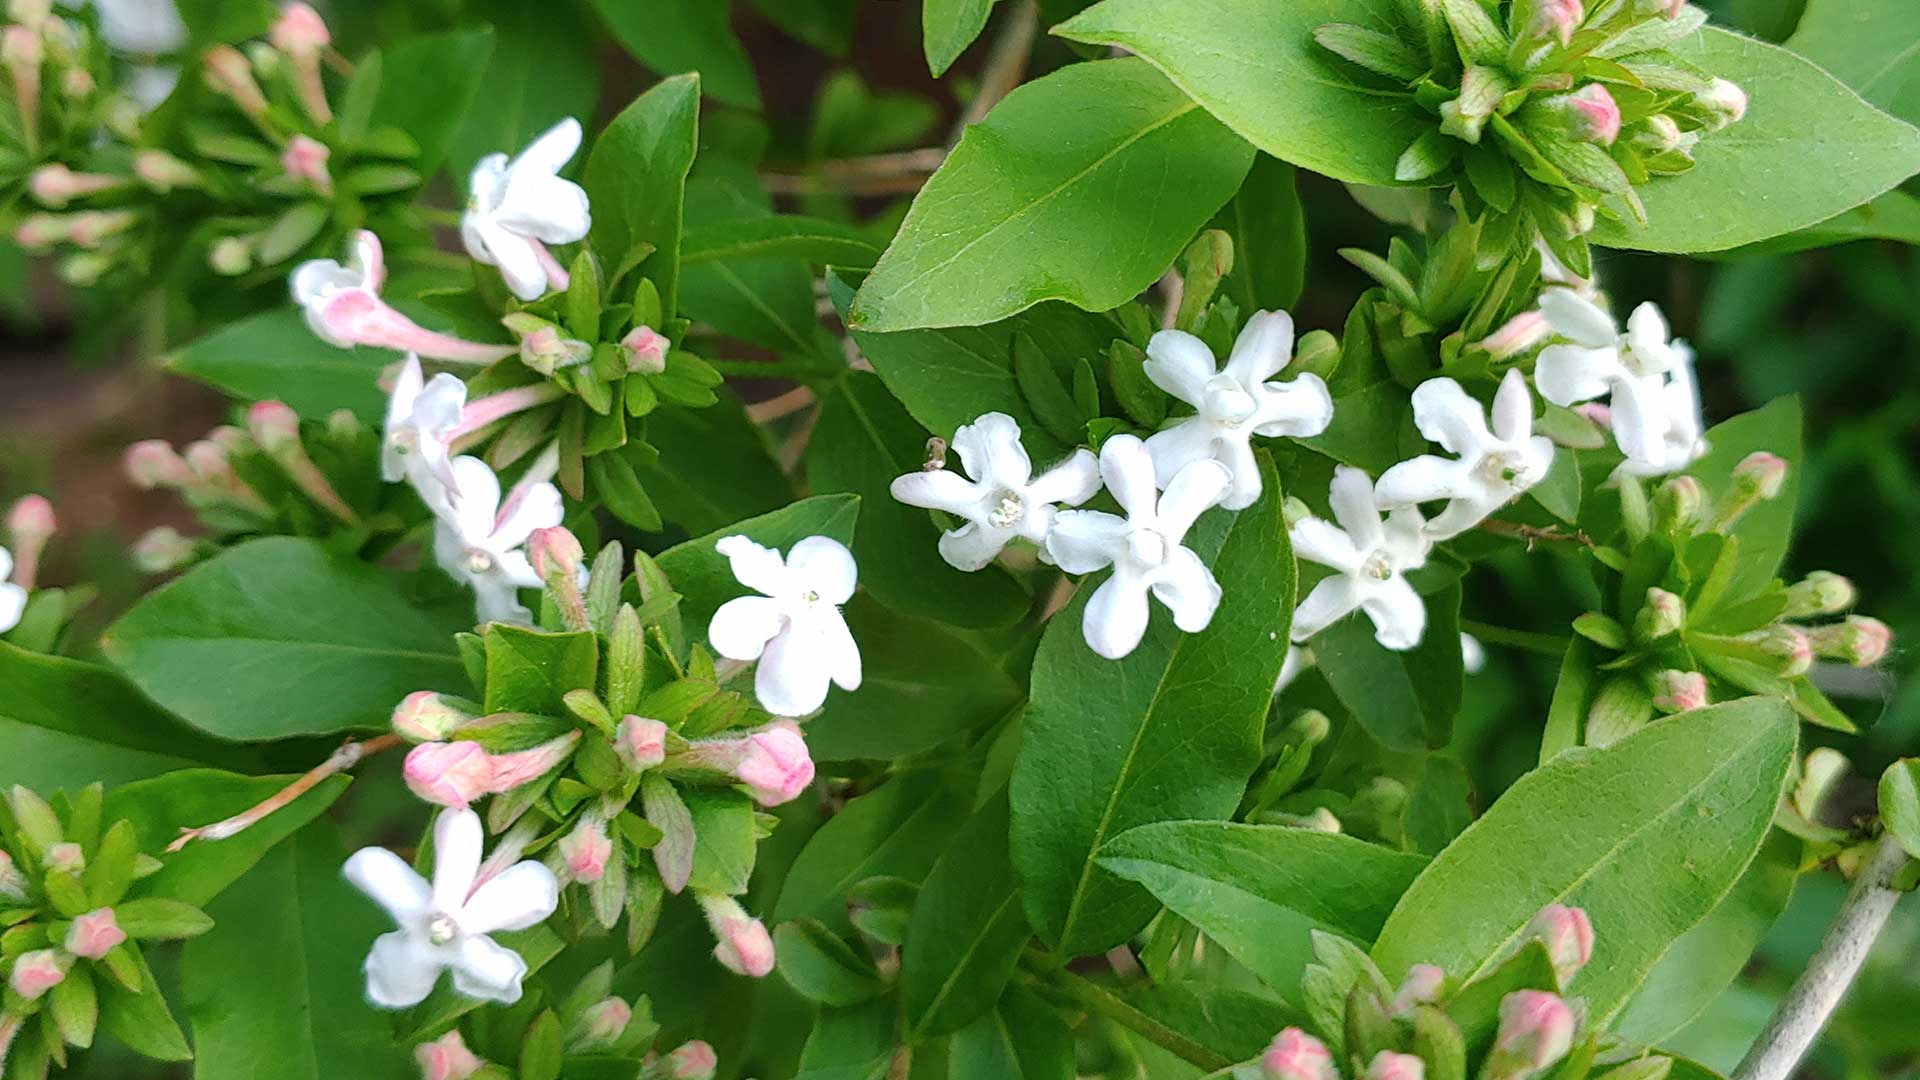
Depending on your local climate, the show kicks off in late spring, usually between May and June. The plant starts by loading its branches with rich, pink flower buds. When these buds open, they reveal tubular, funnel-shaped flowers that are a soft pink on the outside and fade to a clean white on the interior. Sometimes, you will notice deeper pink or carmine tones swirling right inside the flower tube. Each individual flower is quite small—about 10 to 12 mm (roughly half an inch) long—but they feature prominent, long stamens and styles that extend far past the petals. This gives the entire flower cluster a delicate, airy, almost frothy appearance.
[Rich Pink Buds] ──> [Tubular, Funnel-Shaped Blooms] ──> [Persistent Pink Sepals]
  (Early May)           (Pink outside / White inside)       (Mid-to-Late Summer)
Instead of scattering randomly along the stems, these flowers pack tightly together into dense, head-like clusters at the very tips of the branches. When the shrub is in full bloom, it is completely blanketed in color.
Then, there’s the scent. The fragrance is incredibly intense and sweet, often described as a perfect mix of wild jasmine and French lilac. On warm, sunny spring days, the perfume is strong enough to drift across an entire yard. Even better, the show doesn’t abruptly end when the petals finally drop. The calyx sepals (the tiny, leaf-like structures at the base of each flower) stay firmly attached to the plant and blush a beautiful rose-pink. This keeps a subtle, smoky-pink color going on the tips of the branches long after the actual blooms are gone.
Foliage and Year-Round Seasonal Interest
Spring and Summer
Autumn Architecture
Once the autumn chill hits, this plant gives classic fall-foliage superstars like burning bush or maples a serious run for their money. The glossy green summer leaves transform into brilliant, vivid shades of orange, fiery red, and sometimes deep, smoky purple. This reliable autumn color, paired with its elegant arching structure, ensures that the shrub delivers strong multi-season value rather than becoming an invisible green blob after spring passes.
Hardiness and Climate Adaptation
The real crowning achievement of Abelia mosanensis is its sheer, unyielding resilience to freezing weather. While the vast majority of abelia species are strictly limited to the mild winters of USDA Zones 6 through 9, the Fragrant Abelia is reliably hardy all the way down to USDA Zone 4. This means it can easily withstand winter temperatures plunging as low as -30°F (-34°C). In fact, some experienced northern gardeners have successfully grown it in Zone 3, provided it is given a bit of a sheltered microclimate. This makes it the single hardiest abelia available to the modern gardening trade.
The Temperature Trade-Off
There is a catch to this hardiness: Fragrant Abelia does not do well in hot, sticky summer climates. If you try to plant it in the deep South (USDA Zones 8b and warmer, where summer humidity remains oppressive through the night), it will struggle immensely. The heat stresses the plant, leading to poor growth, leaf drop, and minimal flowering. It is truly a plant designed for temperate zones with distinct winters and moderate summers—thriving beautifully across the Midwest, the Northeast, the Pacific Northwest, and similar climates around the globe.
Site Selection and Soil Requirements
To make sure your Fragrant Abelia hits its full potential, it pays to be thoughtful about where you dig the hole. It is a highly adaptable plant, but it definitely has a preference for its living conditions.
-
- Sunlight Exposure: For the biggest flower payout and the most jaw-dropping autumn colors, plant it in full sun. This means finding a spot that gets at least 6 to 8 hours of direct, unfiltered sunlight daily. It will tolerate partial or dappled shade (which can actually be helpful in regions with scorching summer afternoons), but keep in mind that the more shade it gets, the sparser its blooms will be and the less vibrant its fall foliage will turn.
- Soil Preferences: The ideal soil is evenly moist, well-drained, and slightly acidic to neutral. That said, the plant is remarkably forgiving and will adapt to average garden dirt, handling both mild acidity and alkaline conditions without throwing a fit. The only absolute deal-breaker is poor drainage. If you plant it in a low spot where water pools or in heavy, compacted clay that stays soggy, its roots will rot, particularly during the dormant winter months.
- Microclimate and Shelter: Even though the plant handles freezing temperatures beautifully, icy, drying winter winds can whip across open landscapes and cause branch dieback. Tucking it into a position that offers a bit of shelter—like near a fence line, a building foundation, or a windbreak of evergreens—will prevent this winter stress. Additionally, try to avoid planting it in low-lying “frost pockets” where cold air gets trapped overnight, as a sudden, severe late-spring frost can nip the emerging flower buds right before they open.
Step-by-Step Planting Instructions
Timing your planting correctly gives your new shrub the best possible start in life. Aim for the moderate weather windows of mid-spring or early autumn. This allows the root system to settle into its new home without having to battle intense summer heat waves or immediate winter freezes. If you bought a container-grown plant, you can technically plant it anytime the ground isn’t frozen, but spring and fall are by far the kindest windows.
-
- Prep the Area: Don’t just dig a hole the size of the plastic pot. Take a shovel and loosen the soil in a circle at least twice as wide as the root ball. If your soil is sandy, depleted, or heavy, mix a generous amount of compost or well-rotted organic matter into the native soil you dug out. This improves the overall soil structure, drainage, and long-term fertility.
- Handle the Roots: Gently slide the shrub out of its nursery container. Inspect the root ball. If the plant was pot-bound and the roots are tightly matted or circling the interior of the plastic, use your fingers to gently tease them outward. If they are incredibly dense, you can take a clean knife and make a few shallow, vertical slices around the sides of the root ball to disrupt that circular pattern and encourage outward growth.
- Set the Depth: Dig your central planting hole so that it is roughly twice as wide as the root ball, but no deeper than the root ball itself. When you drop the plant in, the top of the root ball should sit perfectly level with—or even just a tiny fraction of an inch above—the surrounding soil surface. Burying the crown too deep can invite rot and cause the plant to fail.
- Backfill and Settle: Fill the hole back in with your amended soil, using your hands to firm it down gently as you go to eliminate any hidden air pockets. Do not stomp the soil down forcefully with your boots, as this compacts the earth and restricts root growth. Once filled, run a hose at the base of the plant to let water thoroughly settle the soil around the roots.
- Mulch Correctly: Spread a 2- to 3-inch (5 to 7.5 cm) layer of organic mulch (like shredded bark or wood chips) over the entire root zone, extending out to the drip line of the branches. This acts as a protective blanket that retains soil moisture, suppresses competing weeds, and regulates root temperatures. Just make sure to pull the mulch back a couple of inches away from the actual woody stems to prevent moisture buildup and pest issues.
- Establishment Watering: During its first and second growing seasons, your main job is to keep the soil consistently moist but never waterlogged. This regular moisture is critical while the shrub builds the deep, extensive root system it needs to become self-sufficient.
Water Requirements: Finding the Balance
For Mature Plants
As a rule of thumb, check the soil during dry summer stretches. If the top 1 to 2 inches (2.5 to 5 cm) of soil feels dry to the touch, it is time to water. When you water, do it slowly and deeply. You want the water to saturate the entire deep root zone, which encourages the roots to grow downward. Frequent, shallow sprinkles do more harm than good because they encourage weak, surface-level roots.
Seasonal Adjustments
-
- During Establishment: Keep the soil evenly damp (think of a wrung-out sponge) through the first two years. The mulch layer will be your best friend here, reducing how often you need to drag out the hose.
- Winter Care: When the autumn leaves fall and the plant goes dormant for the winter, its water needs drop drastically. However, if you live in a region with incredibly dry, windy winters without consistent snow cover, make sure the root zone doesn’t bone-dry completely. Give it a good drink right before the ground freezes solid.
- Drought Warning: While it won’t instantly die during a prolonged drought, severe moisture stress will cause the plant to protect itself by scorching its leaves, dropping foliage prematurely, and drastically reducing the number of flower buds it sets for the following spring.
Fertilization: Less is More
One of the nicest things about Abelia mosanensis is that it is not a heavy feeder. In fact, if you over-fertilize it, you will actually ruin the plant’s form by triggering a massive explosion of weak, floppy, purely green vegetative growth at the absolute expense of spring flowers.
When and How to Apply Supplemental Food
If your soil is notably poor, sandy, or a soil test reveals a severe nutrient deficiency (often signaled by unusually slow growth and pale, washed-out leaves), you can apply a balanced, slow-release fertilizer explicitly formulated for woody shrubs.
Crucial Rule: Never fertilize this shrub late in the summer or autumn. Doing so forces the plant to push out tender, soft new growth right when it should be winding down and hardening off for winter. That late-season growth will get instantly zapped by the first frost, creating a pathway for disease and dieback.
The Golden Rule of Pruning
Pruning Windows
-
- For Light Shaping and Deadheading (Highly Recommended): Do your trimming immediately after the flowers fade in late spring or early summer (usually June). This perfect window gives the plant the entire rest of the summer season to push out fresh, vigorous stems and comfortably set its flower buds for the next spring.
- For Structural Fixes or Major Rejuvenation: If the shrub has become genuinely overgrown, messy, or misshapen, you will need to perform more drastic pruning. Do this in late winter to early spring (late February to early April) while the plant is completely dormant. Go into this knowing and accepting that you will be sacrificing most, if not all, of your flowers for that upcoming season in exchange for a healthier plant down the road.
[Late Winter / Early Spring] ──> Dormant Window: Structural fixes / Hard rejuvenation
                                 (Accepting that you will lose spring blooms)

[Late Spring / June]         ──> Post-Bloom Window: Light shaping / Deadheading
                                 (Perfect for maintaining form and future flowers)
How to Prune
-
- The Essentials: You can cut out dead, broken, or clearly diseased wood any time of the year. Always cut cleanly back to healthy, green tissue.
- The One-Third Rejuvenation Rule: To keep your abelia youthful and full of energy, it is wise to practice “renewal pruning” every 2 to 3 years. Identify the oldest, thickest, most woody stems and cut up to one-third of them completely down to ground level. This opens up the center of the shrub to sunlight and fresh air circulation, while stimulating strong, young, highly productive shoots to take their place.
- Maintain the Natural Habit: Shape the plant lightly by trimming back wayward or stray branches to maintain its beautiful, naturally rounded, arching form. Avoid heavy, formal shearing (like you would do to a boxwood hedge). Hard shearing creates a dense outer shell of leaves that blocks sunlight from reaching the interior, causing the inside branches to go bare and die out.
- Control Watershoots: Keep an eye out for “watershoots”—those aggressively fast-growing, perfectly straight vertical shoots that pop up from the base. Snip these off completely at the ground line to preserve the plant’s elegant natural architecture.
- Winter Damage Recovery: If you experience a truly brutal winter and suspect your shrub suffered severe dieback, don’t rush out to prune it in early spring. Wait until late spring. Sometimes, branches that look completely dead and grey will surprise you by leafing out a bit later than the rest of the plant. Once you see exactly where the live growth starts, you can cleanly prune away the truly dead tips.
Simple and Effective Propagation
If you fall in love with your Fragrant Abelia and want to scatter a few more around your property, trying to grow them from seed is a losing game. The seeds often have incredibly low viability, are frequently sterile, and take years to mature into a flowering plant. Instead, vegetative propagation via semi-hardwood cuttings is the gold standard. It perfectly preserves the exact traits of your parent plant and gets you flowers much faster.
Step-by-Step Semi-Hardwood Cuttings
-
- Timing is Everything: Take your cuttings in mid-summer (July to August). This is when the current season’s fresh green growth is just starting to “lignify”—meaning the base of the stem is turning firm and woody, but the tip is still flexible and green.
- Take the Cut: Choose healthy, strong, non-flowering shoots. Snip a piece about 4 to 6 inches (10 to 15 cm) long, making your cut cleanly right below a leaf node (the bump where leaves grow).
- Prep the Cutting: Strip away all the leaves from the bottom half of your cutting. If the remaining top leaves are quite large, use clean scissors to snip them directly in half. This feels counterintuitive, but reducing the leaf surface area drastically cuts down on water loss while the stem has no roots to drink with.
- Hormone Boost: Dip the wounded bottom end of the cutting into a high-quality rooting hormone powder or gel (an IBA formulation around 1,000 to 2,000 ppm works beautifully) to jumpstart root development.
- Stick the Cutting: Insert the prepped stem into a small pot filled with a highly porous, sterile, sharp-draining medium. A 50/50 mix of potting compost and perlite, coarse sand, or horticultural grit is ideal.
- Create a Greenhouse Environment: Place the pot in a warm (65 to 72°F / 18 to 22°C) spot that receives bright but strictly indirect light. Pop a clear plastic bag over the pot or place it under a propagation dome to lock in humidity. Make sure to open it up for a few minutes once or twice a week to vent the stale air and prevent mold from taking hold.
- The Wait: Keep the medium consistently damp. Roots will typically form anywhere from 3 to 10 weeks. You can check their progress by giving the stem an incredibly gentle upward tug. If you feel solid resistance, congratulations—you’ve got roots.
- Wintering and Planting: Pot the successfully rooted cuttings into individual containers and let them spend their very first winter in a highly sheltered location, like an unheated greenhouse or a cold frame. Once the final spring frosts have safely passed the following year, you can plant them directly out into the garden.
Troubleshooting: Pests, Diseases, and Environmental Issues
Minor Pests
-
- Aphids: In early spring, these tiny, sap-sucking insects might cluster on the tender new growth, causing the leaves to curl slightly and leaving behind a sticky residue called honeydew. A sharp, forceful blast of water from your garden hose is usually enough to dislodge them. For severe cases, a thorough coating of organic insecticidal soap or neem oil will do the trick.
- Spider Mites: If your summer is incredibly hot, dry, and dusty, these microscopic pests can move in, causing the foliage to look stippled or washed out. Hosing down the plant regularly to raise local humidity helps prevent them, but a specialized miticide or horticultural oil can be used if they get out of hand.
- Scale Insects: These look like tiny, hard, immobile bumps stuck to the wooden stems. You can scrape minor populations off by hand using a fingernail or a soft brush, or treat the bare branches with an organic dormant horticultural oil during the winter.
Fungal Issues
-
- Powdery Mildew: If your garden suffers from stagnant air or high humidity, a white, chalky, powdery coating can develop on the leaves. You can prevent this completely by spacing your shrubs properly to ensure excellent airflow and avoiding overhead watering.
- Leaf Spot: Wet, rainy summer weather can sometimes bring about fungal leaf spots, which show up as unsightly brown or black dots on the foliage. Pluck off and throw away any badly infected leaves, and clear away fallen autumn debris around the base of the plant to keep the fungus from overwintering in the soil.
- Root Rot: As mentioned earlier, this is a direct result of drowning the plant in soggy, undrained soil. Ensure excellent drainage right from day one.
Wildlife and Environmental Problems
-
- Deer and Rabbit Resistance: This is one of the absolute best perks of the plant. Fragrant Abelia is highly deer-resistant. Because of the natural textures and aromatic compounds in the wood and foliage, deer almost always completely ignore it, even in high-pressure areas. Rabbits rarely touch it either, though they might occasionally nibble the lower bark during desperate, snow-heavy winters when no other food is available.
- Chlorosis (Yellowing Leaves): If the leaves are turning a pale yellow but the veins remain dark green, your plant is likely suffering from an iron deficiency. This usually happens if your soil is excessively alkaline, which locks up iron so the roots can’t absorb it. You can treat the plant with chelated iron and work organic matter into the soil to help lower the pH over time.
Creative Landscape Design Ideas
Because of its balanced size, graceful arching habit, and multi-season beauty, this shrub can be used in a wide variety of ways across your property:
-
- The Sensory Focal Point: Plant it right next to a backyard patio, an outdoor seating area, a front porch, or a main garden walkway. This ensures that when May rolls around, you can actually sit back and enjoy the powerful, sweet fragrance every single day.
- The Foundation Framing: Its neat, compact, 4-to-6-foot rounded habit makes it a beautiful choice for foundation plantings around your home. It works exceptionally well on the north or east sides of buildings where it can catch gentle morning sun and get a break from intense afternoon heat.
- A Fragrant, Informal Hedge: If you want to define a property line or separate garden rooms without putting up a stark wooden fence, plant a row of these abelias. If you want a perfectly dense, tight hedge, space the individual plants 4 to 5 feet apart. If you prefer a loose, more naturalistic, open-screen look, space them 6 feet apart.
- The Mixed Shrub Border: Create an ever-changing sequence of color by pairing Fragrant Abelia with other cold-hardy garden classics. It looks stunning alongside spring-blooming lilacs (Syringa), early-summer spireas (Spiraea), colorful ninebarks (Physocarpus), and late-summer panicled hydrangeas (Hydrangea).
- A Pollinator Sanctuary: The nectar-rich, tubular spring flowers act like an open buffet for local wildlife. It is an absolute magnet for native bumblebees, beautiful butterflies, and early-season hummingbirds looking to refuel.
- Woodland Edges: Its soft, arching shape looks incredibly at home planted along the informal, shifting edges of a woodland garden, where it can easily blend into a more naturalized, rustic landscape.
- Can it be grown in containers? While its ultimate mature size means it isn’t a great candidate for permanent, lifelong pot culture, young specimens can be grown beautifully in large, heavy patio containers (think 15 gallons or larger). Just remember that container roots are much more exposed to the cold than roots insulated by the earth. If you live in a severe winter climate, you will need to wheel the container into an unheated garage, shed, or sheltered basement for the winter months to protect it from extreme freezes.
Cultivars and Selections
-
- ‘Sweet Emotion’ (SMNAMDS): This is a highly popular, trademarked selection promoted by Spring Meadow Nursery. Bred and selected in the chilly climate of Latvia, it is specifically prized for its guaranteed USDA Zone 4 hardiness, a slightly more refined and dense growth habit, and an incredibly profuse flower display. If you are gardening in an area known for severe, unpredictable winter weather, this is your best option.
- Standard Abelia mosanensis: These are plants sold directly under the true species name without a specific cultivar designation. They are still exceptionally cold-hardy, robust, and widely grown. Because they aren’t cloned cultivars, you might notice a tiny bit more natural variation in how arching their branches are or how deep the pink tones in the flowers get, but they are consistently vigorous, beautiful, and reliable choices.